Welcome everyone!
I'm so excited and happy to be invited to the
as a
guest designer this month!
Before I
start, I would like to tell you that I'm not a person of many words and see my blog
as a source of inspiration, which means you'll get the hints and tips there
and I will point out any especially interesting features - but with pictures rather than a lot of words.


It's summertime here and I hope you are having a great time.
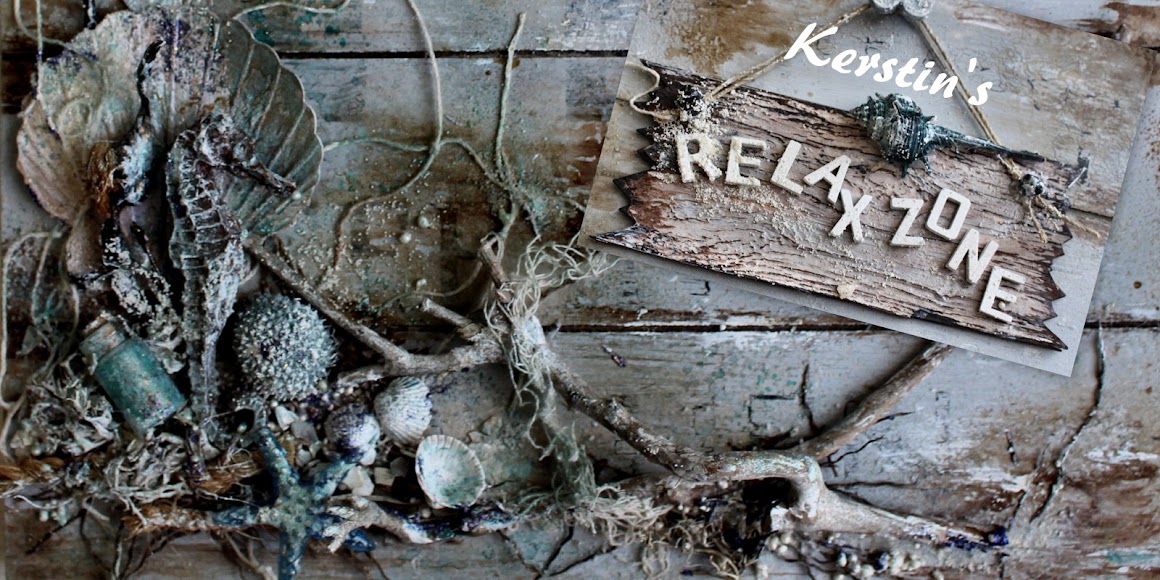
I was inspired to create a maritim cover for a mixed media sea album.
I love the look of old weathered structures, they give the project a special character. So I combined some handmade wooden planks in the background with a rusty porthole in the foreground. Behind it a seahorse looks out shyly, I love these creatures and therefore you can often find them on my maritime projects.

I choose a very simple technique for my background.
1. Start priming a grey cardboard in size of your album.
I used a blue shade mix of acrylic paints
2. Cut several cardboard strips of the same width
3. Glued on your painted cardboard with some distance between the stripes
4. now you can design the wooden planks as you like,
I started with crackle paste and used a mix of white, turquise and marine acrylic color

Tips - Porthole
1. Use two circle dies for the outer ring,
I love it to use structure paper
2. Punch out two circles in the right size,
one made of foil and one for the background, which you can design as you like.
I stamped it with a seahorse and some structure.
3. The outer ring was created with acrylic paint and
Paper Artsy RUSTING POWDER
I spritz with diluted white vinegar,
the rusting process is thus set in motion more quickly.
I recommend rusting it overnight in a dark damp place.
In order to enhance the effect I also use earth coloured deco sand .


Thanks for your visit!

It's summertime here and I hope you are having a great time.
I was inspired to create a maritim cover for a mixed media sea album.
I love the look of old weathered structures, they give the project a special character. So I combined some handmade wooden planks in the background with a rusty porthole in the foreground. Behind it a seahorse looks out shyly, I love these creatures and therefore you can often find them on my maritime projects.

I choose a very simple technique for my background.
1. Start priming a grey cardboard in size of your album.
I used a blue shade mix of acrylic paints
2. Cut several cardboard strips of the same width
3. Glued on your painted cardboard with some distance between the stripes
4. now you can design the wooden planks as you like,
I started with crackle paste and used a mix of white, turquise and marine acrylic color

Tips - Porthole
1. Use two circle dies for the outer ring,
I love it to use structure paper
2. Punch out two circles in the right size,
one made of foil and one for the background, which you can design as you like.
I stamped it with a seahorse and some structure.
3. The outer ring was created with acrylic paint and
Paper Artsy RUSTING POWDER
I spritz with diluted white vinegar,
the rusting process is thus set in motion more quickly.
I recommend rusting it overnight in a dark damp place.
In order to enhance the effect I also use earth coloured deco sand .


All of the products I've used on today's project
that are available from Simon Says Stamp are linked below
Altenew HALFTONE CIRCLES NESTING DIE
Tim Holtz Distress Oxide Spray WALNUT STAIN Ranger
Dina Wakley Ranger TURQUOISE 1OZ Media Acrylic Paints
Dina Wakley Ranger WHITE 1OZ Media Acrylic Paints
Dina Wakley Ranger MARINE 1OZ Media Acrylic Paints
Dina Wakley Ranger NIGHT 1OZ Media Acrylic Paints
Dina Wakley Ranger UMBER 1OZ Media Acrylic Paints
Dina Wakley Ranger BLACK 1OZ Media Acrylic Paints
Paper Artsy RUSTING POWDER

Thanks for your visit!
I hope this was a bit of inspiration for you!
If you have any special questions, please feel free to ask!
! SEA you next week :-)!
If you have any special questions, please feel free to ask!
! SEA you next week :-)!


